

Starting from Windows 11, TPM 2.0 is essential for Windows 11. The installation process will check the availibility of TPM.
But not all server hosts come with TPM modolue. Just like those servers in my homelab. They don't have any TPM module available on the motherboard. To overcome this requirement, vSphere now providing a Virtual TPM (vTPM) module to simulate the hardware TPM.
This vTPM feature can be enabled on vCenter. In other to deploy vTPM module, a key provider is required. Following is the procedures of how to.
Login the vCenter web admin interface.
Select the vCenter appliance from the left pane.
Click "Configure" on the righ pane.
Click "Add".

Click "Add Native Key Provider".

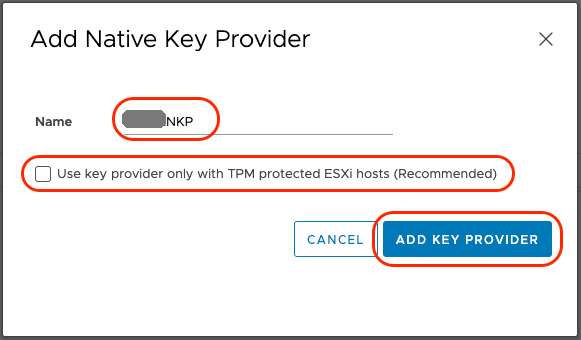
Provide a name for the Native Key Provider
De-select the "Use key provider only .........." if your server does not have hardware TPM module.
Click "Add Key Provider".
The newly created Key Provider will be listed. But it is not yet ready to use. You need to backup before futher operation.
Select the Key Provider just created.
Click "Back up".

Check "Protect Native Key Provider data with password (Recommended)".
Provide a password.
Check "I have saved the password in a secure place".
Click "Back Up Key Provider".
A key file will be downloaded. Place keep the key file in a save place.

The key provider created successfully and ready to use.

Now you will see a new device type "Trusted Platform Module" is available.
You can add this to VM created.
Or add this TPM during the creation of new VM.

----- END -----
Comments